I know I've been saying this for months, but progress on the bathroom is underway. No, seriously. The electrician came out Monday and rerouted some outlets and prepped the ceiling for my pendants and chandy. And as I sit here typing, I can hear the plumber making all sorts of noise with a saw. Later today the drywaller is coming to seal up the ceiling...the attic space above the shower has been exposed for the last three months and has permeated my bedroom with an unpleasant, musty smell. AND then, later later, the contractor will hopefully be by to put the subfloor back down so that I don't have to worry about any of the kids falling through the drywall into the basement. Folks...we may have a functional bathroom within a few weeks. Hallelujah!!!
This happy news is a great segway into the title of this post...kids room revamp {using crap from my garage}. With my budget pretty much zero {due to all things bathroom}, I was forced to to revamp the kiddos bedroom using stuff I already had in my possession.
So, I decided to scavenge the garage and house to see what items I could reuse.
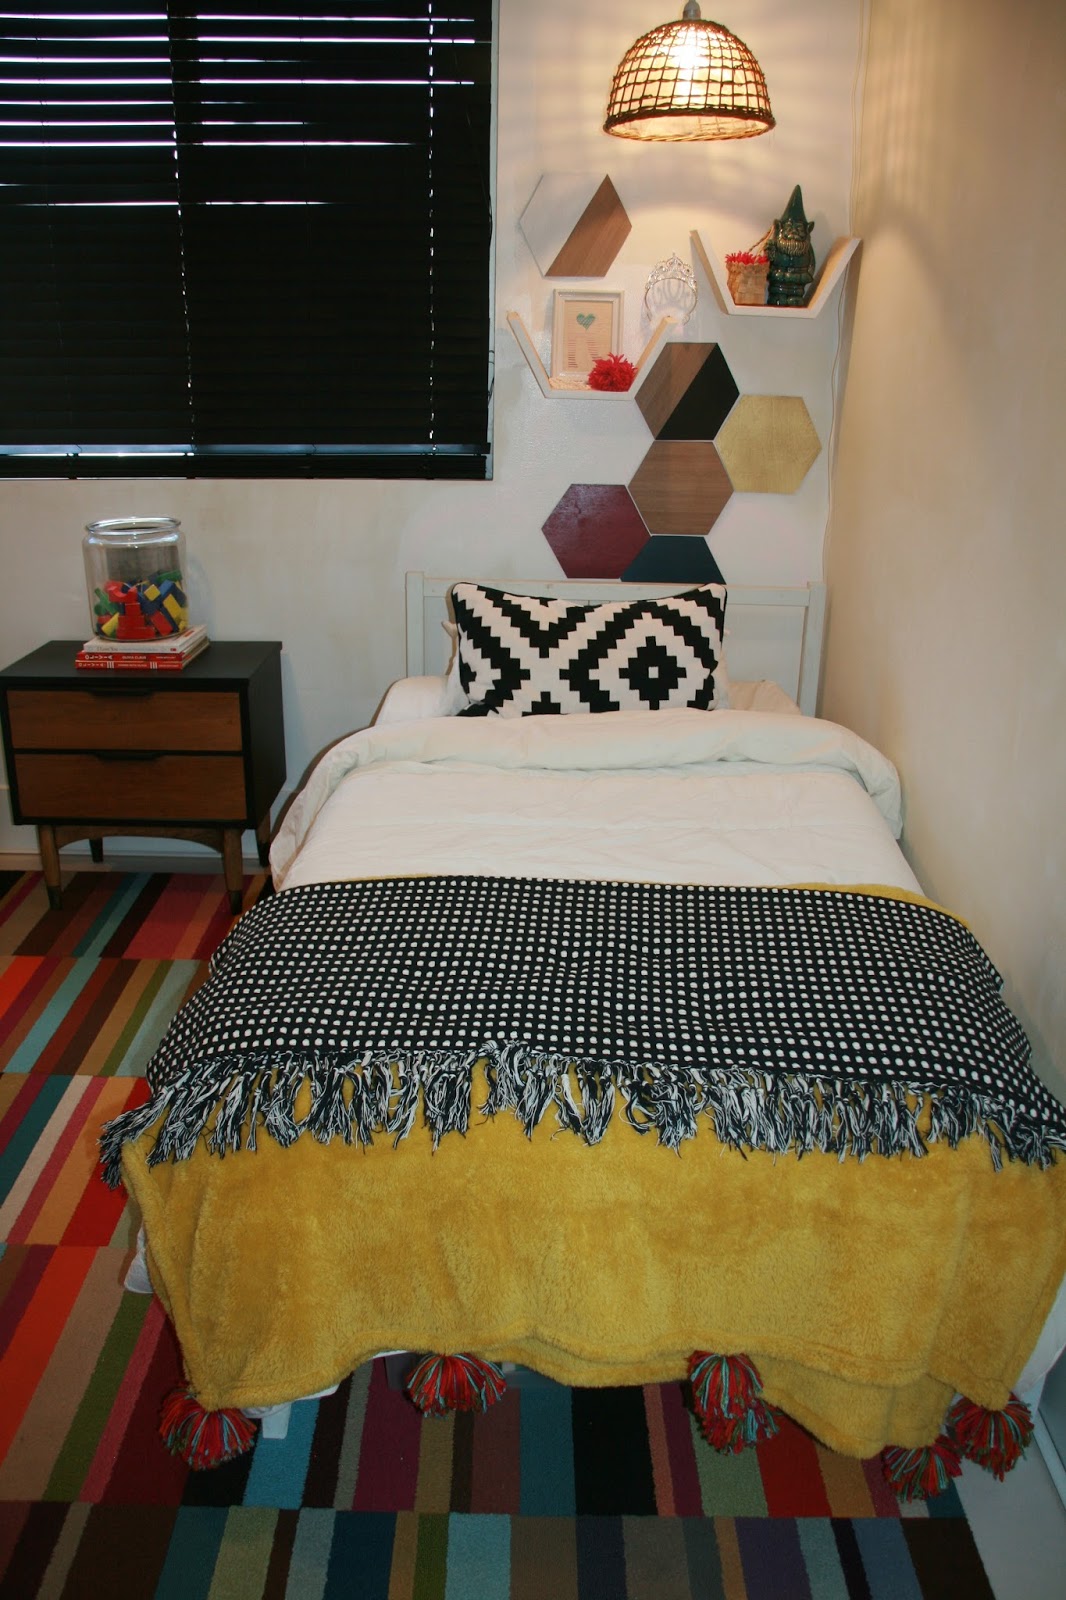
I had a ton of leftover wood veneer from my dresser project. It is absolutely beautiful and I hated that it was sitting in storage collecting dust. I decided to create some hexagon "tile" with it...since the honeycomb motif is all the rage right now.

 It was a super easy project {I simply cut the hexagons out of the veneer with scissors}that has a lot of visual impact.


I painted some, but also left some natural wood because I love the color and grain of it.
I also used some of the left over veneer to make some customized artwork.
An embroidered, ombre "R" for Rowan
I also used some of the left over veneer to make some customized artwork.
An embroidered, ombre "R" for Rowan

and a super cool image of master Yoda for my Star Wars fanatic, Beckham.

Who knew you could print on wood veneer? It took a little coaxing and multiple attempts, but I finally got it to work. {because the veneer is significantly thicker than paper, you have to manually help it through the printer so that it doesn't get stuck}.
The kiddos needed some shelving for housing a few personal items, so I decided to make some "half hexagon" shelves out of a plank of wood I had bought awhile ago for some reason that I can't remember now.


I used one 4x8 plank of wood which runs about $6 at the home improvement store, and was able to make four shelves out of it. I think they turned out pretty good considering they were only $1.50 a piece to make.
I made the kiddos new pendant lights for above their beds using some wicker, food cover dealies I found for $7. This project was so easy and cheap. Don't you just love customized lighting?!


I revamped the nightstand {for the third time}
{green phase}

{blue phase}
 using some spray chalkboard paint I had on hand. I actually like how resistant chalkboard paint is and how easy it is to clean. And since the kiddos have a knack for doodling all over furniture, I figure I'm one step ahead of them now.
{black phase}
{green phase}

{blue phase}

{black phase}


The white blinds have been bugging me for a long time. I'm over plain white blinds. I love matchstick/bamboo blinds, but they are super pricy and purchasing some was not in the budget. So, I grabbed my can of chalkboard paint and went to town.

I think the "not new, but greatly improved" black blinds are much cooler than the white...at least aesthetically speaking . I'm always amazed by what a can of paint can do....and better still, the revamp only cost me $10 {I ran out of paint and had to buy two more cans}.
I don't know about you, but my kids aren't always the most accomodating when it comes to bedtime. I decided to try out some "mommy mind tricks" to see if it might aid in the bedtime ritual. I made this simple/inexpensive hopscotch mat out of cork board squares.

Cork tiles are readily available at Walmart and Target and cost around $5/ four squares. I stensiled the numbers on using regular, old craft paint and attached the squares together using duck tape.
 The hope is that when it comes to bedtime now, the little ones will be excited to hopscotch their way right into bed. I don't know how long the novelty will last, but here's to hoping.
I don't know about you, but my kids aren't always the most accomodating when it comes to bedtime. I decided to try out some "mommy mind tricks" to see if it might aid in the bedtime ritual. I made this simple/inexpensive hopscotch mat out of cork board squares.

Cork tiles are readily available at Walmart and Target and cost around $5/ four squares. I stensiled the numbers on using regular, old craft paint and attached the squares together using duck tape.

The last space to be addressed is this little reading/play area. Every kids room needs a kid sized rocker and faux sheep sking rug, no? I found the rocker a while back at the thrift store for $5 and I stole the rug out of my bedroom. I think some wall storage for books and toys etc. might be in order since the room is majorly lacking in storage, but I'm still in the blue print stages of the design. Stay tuned for the dramatic conclusion!!!
 For now the space serves as a little reading nook/baby doll rocking area.
Aside from the laminate and carpet, this little revamp only cost me around $50.

Aside from the laminate and carpet, this little revamp only cost me around $50.