Showing posts with label West Elm. Show all posts

Wednesday, August 28, 2013

W.O.W Wednesday- Create perfect spaces with "inspiration boards"...and save on gas at the same time.

I am notorious for purchasing things and taking them back.  I've always been a "fly by the seat on your pants" type person, but I'm learning that when it comes to decorating sometimes having a plan is just plain better.  That doesn't mean you can't be flexible or spontaneous, but a little forethought in planning out a space is usually a good thing.

So, my word of wisdom for today is...use an inspiration board.

I've mentioned them before, but I really like the photo editing website Picmonkey.  I could spend hours playing around with my pictures and they have a great, new "collage" tool that is perfect for making inspiration boards.

I am hopeful that this little gem will significantly cut down on my returns and in turn will significantly improve the gas budget.

I have been struggling with decorating my master bedroom.  I have gone through countless throw pillows, several quilts and comforters and dozens of lamps and shades in various configurations.  I still haven't gotten it right.  

Well, all that is about to change...hopefully.  I used the Picmonkey collage tool to pick out all of the components for my "ideal" bedroom.  Even if I can't afford, or can't find the exact item, it still gives me a great starting off point before I head out shopping.

I've been ogling these frayed edge sheets from West Elm.  I love the look of classic white sheets.  They are so versatile and so fresh and bright.
I also found these beautiful geometric/tribal-esque accent pillows at West Elm that would be perfect in the space.


My birthday is coming up next week and I'm hoping Studs might let me get a new bed.  Ideally I'd love a bed like this reclaimed wood one.  My room needs some warmth and this bed would definitely do the trick.

I've already got a set of gold floor lamps similar to one below

And of course my blue nightstands

And here's how everything looks together.
Seeing everything together helps me visualize how it will all play together and look in the actual space.  I love how all of colors and patterns compliment each other, but as much as I love my royal blue nightstands, I may end up having paint them another color.  What do you think?  A little too bright?  Okay?  What color should I paint them instead?

So, the moral of today's post is...

do yourself a favor and save yourself time and gas money by creating an inspiration board before you set out on a shopping journey.  There is nothing more frustrating than spending hours at the store and not finding anything, or spending hours at the store only to have to return everything.  With an inspiration board you can plan out exactly what you want/need and can set out shopping with a plan in hand.


Thursday, April 18, 2013

Pillow Talk

Let it be known that I love toss pillows.  

I'll save you all the lengthy dissertation on how obsessive personalities run in my family and how I tend to get fixated on certain things...uh hum, David Beckham anyone?

Anyway, I just love accent pillows.  I especially love having extras on hand that I can pull from when I am feeling the need to switch things up.

That all said, I thought I would share one of my favorite tips for making pillows...cloth napkins {and kitchen towels}.

Not only are napkins {and towels} the perfect, pre-formed size for accent pillows, they also tend to offer a wide variety of interesting patterns and colors.  Oh!  And they are also really cheap.  Cha-ching.

I recently came across this brightly colored dish towel.  Only I didn't see a dish towel, I saw the perfect accent pillow for my bed.
There was no cutting and no hemming involved...just sewing four straight lines {and if you don't sew, there are all sorts of liquid stitch and heat activated options you could try}.  What could be easier than that?

Voila!  A beautiful, bright and one of a kind pillow that took all of fifteen minutes to make {probably less if I wasn't using the world's crappiest sewing maching}.


And for your inspiration...

I saw these napkins at West Elm, a set of four for $20.  That works out to be $10 per pillow, or you could always add a contrasting color to the back of each and make four pillows for a little over $5 a piece.  Ba-Bam!
 I think I love the dark pink best.

And who doesn't love a playful polka dot...especially those of the "ikat-y" variety?
These napkins, also from West Elm retail at between $16-20 for a set of four.
I'll take a set in blue, thank you!

I love this geometric pattern...especially the green...and the black...and the tan.
$16 for a set of four at West Elm.

Can you tell I love West Elm...remember the little "fixation" bit I talked about at the beginning of the post?

Anyway, next time you find yourself in the market for some new throw pillows, maybe you will consider passing up the premade ones and will consider making some of your own.  I promise you will be the envy of the PTA.  In fact, your popularity might propel right into the president's seat.  Is that a good thing?  I don't know.  But at least you'll have some totally rad pillows to admire {and rest/bang your head on} while you plan out a year's worth of activities.

You're welcome!


Saturday, March 2, 2013

West Elm Dresser Knock-Off

The last few weeks have been a little hectic.  My daughter had a piano recital a few days ago, and also just competed in a piano competition last night.  She did such an awsome job.  I just had to share how proud I was off her.  She is turning into quite a poised little lady.

After her competition, we drove straight to my son's belt test for karate.  This test was kind of a big deal, so he was really nervous....so nervous, he asked us to stay home.  The fam and I sat in the car and watched through the front windows while he tested.  He had no idea we were even there.  I am proud to say that my son is now a ban-bu belt and is only two belts away from a black belt.  Hi-ya!!!

{sorry for the grainy pic, my husband took it on his iphone}
Is it just me, or is he channeling his inner Napolean Dynamite?  Congrats on your sweet, karate skillsss.

I rarely share personal stuff, mainly because this is a DIY blog and personal stuff just doesn't seem to fit the content.  But, technically, I did make my son and daughter, so I think it counts. 

I have also been working on a dresser revamp for the last week or two, in between my stints as chaffeur, maid and cheerleader.  It was a bit of a challenge since the median temperature here in SLC has been about 35 degrees.  Spray paint and freezing temperatures do not go well together.

It took me a little longer than I expected, but I can finally say...she's done!

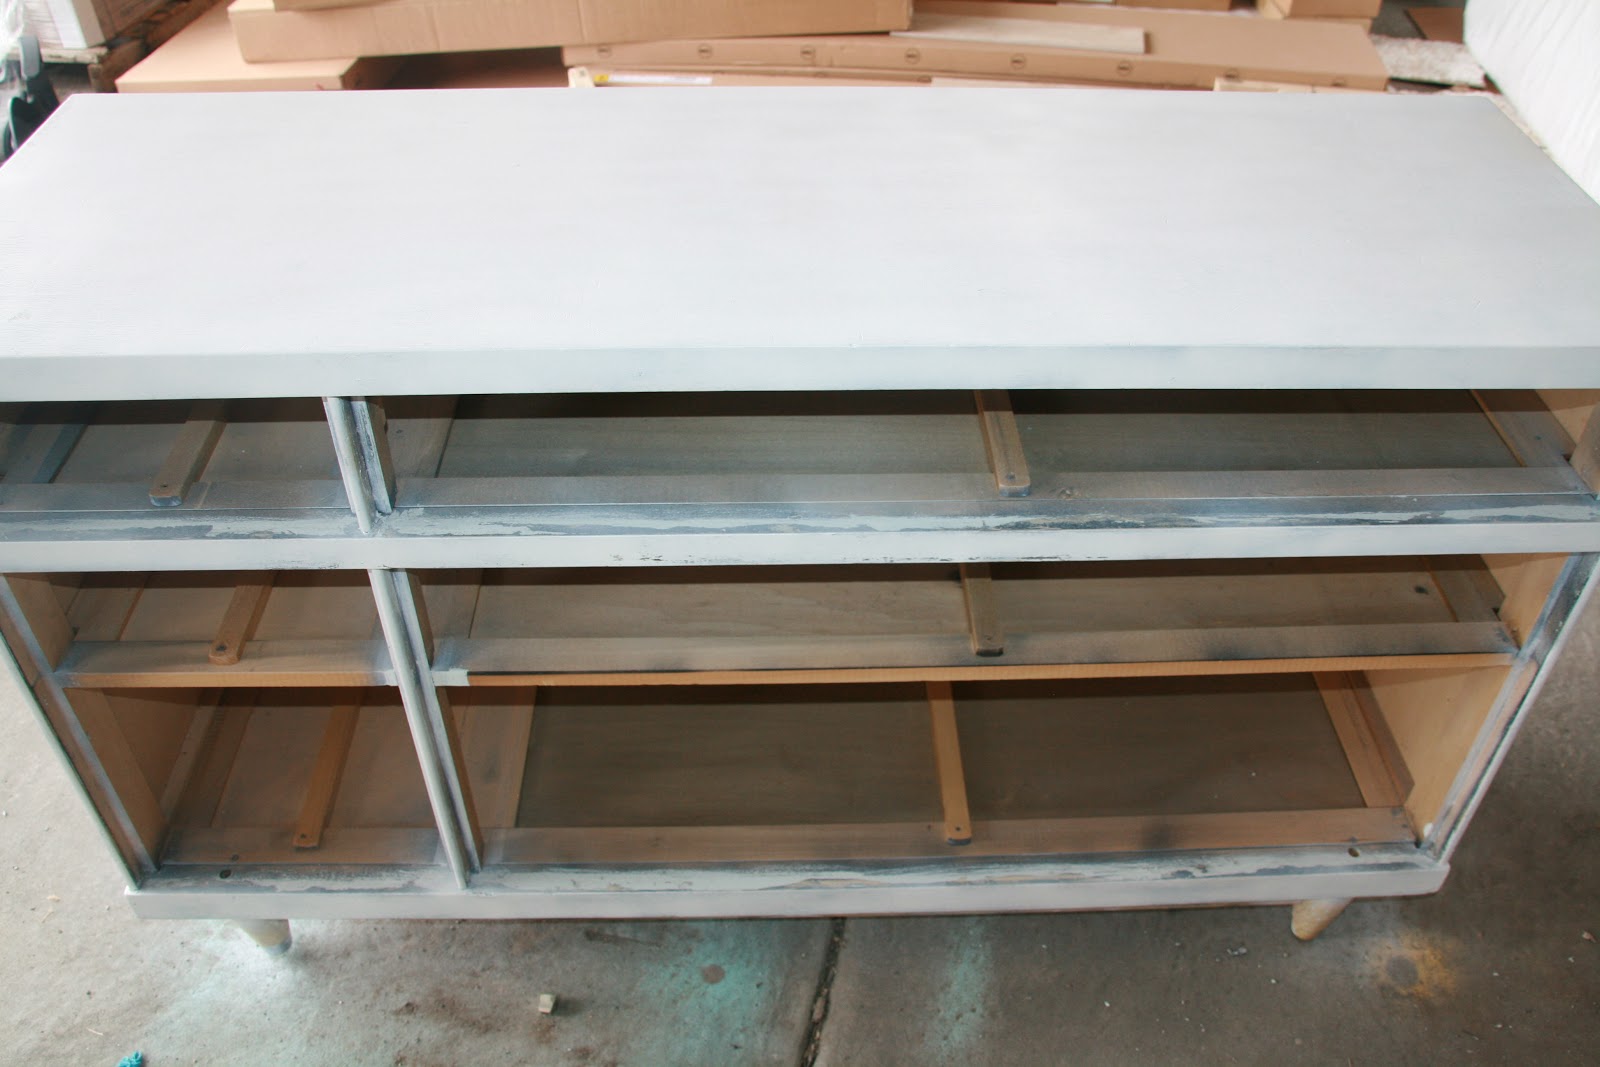
She started out in pretty rough shape.  She had a layer of paint that was peeling off.


And underneath ,the finish was a hideous, blonde color with dents, scratches and chips all over. 


I was able to look over all of these superficial imperfections mainly because she had the gorgeous, mid-century style that I absolutely love.

I removed as much of the paint and old finish as I could using Jasco brand painter stripper.


Once I had the majority of the paint removed, I gave her a good sanding and a few coats of spray primer.  I took care to sand in between each coat.


After two coats of primer, I gave her coat of gloss white spray paint.  Once she was finally dry, I sanded her again and applied another coat of spray paint.  In total, I ended up doing about three coats of paint.
I really wanted to do something new and different with this dresser.  After a couple days of thinking about it, I decided to try my hand at using wood veneer.
I used REAL wood veneer that I purchased off of Amazon.com.  I ordered three different colors a dark maple, a light birch, and a natural/gray walnut.  The sheets of veneer I purchased were 2 ft x 8 ft and were around $20-25 a piece.
I liked the way all three woods looked together, so I decided to use a combination of them on the fronts of the dresser drawers.  I was a little nervous at first, having never worked with wood veneer before.  But, I was pleasantly surprised at how easy it was to handle. 

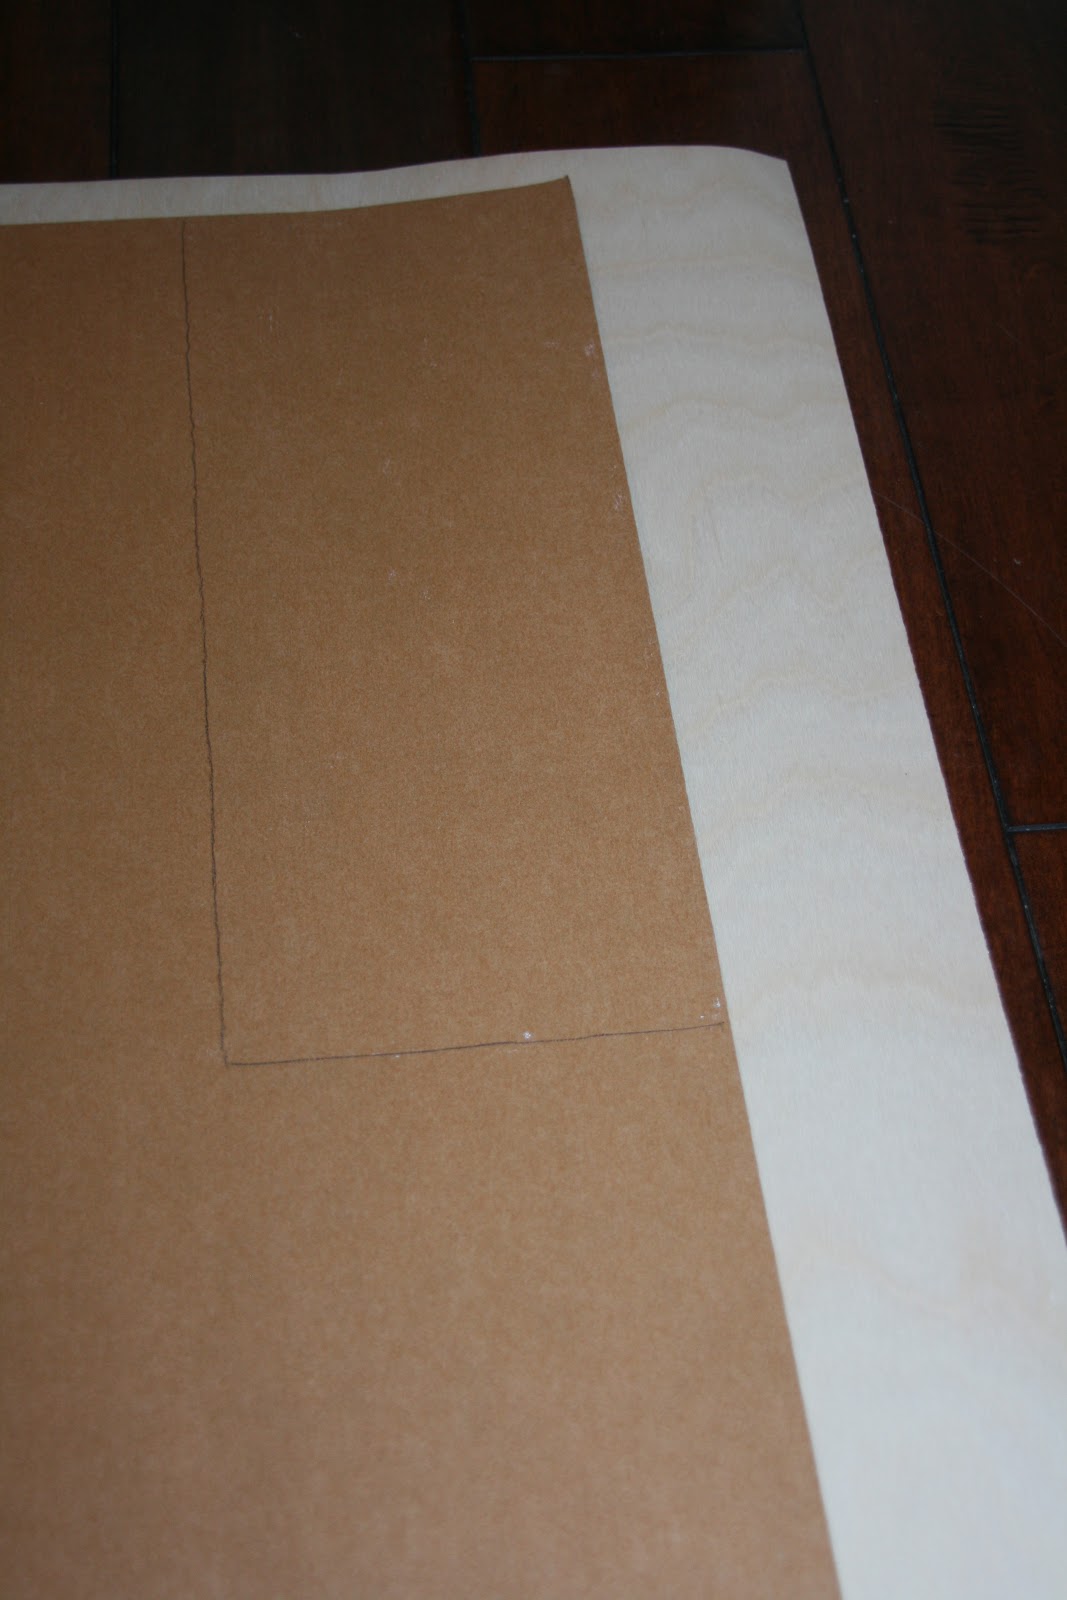
 I simply placed the face of the drawer down onto the backside of the veneer and traced around it with a pen, then cut the piece out.


I could very easily cut the veneer with sharp scissors, eliminating the hassle of using any kind of electric saw.  I was beyond excited about not having to spend any more time in my freezing garage.

Once I had all of my pieces traced and cut out, I adhered them to the drawer fronts using this stanky, toxic crud...which, coincindentally, resulted in an unexpected vanilla pudding craving


{I painted a coat on both the drawer front and the back of the veneer with a disposable brush, as per the recommendations on the back of the adhesive.}  By the time I went to bed that night I had a headache...and the munchies.
The veneer stuck immediately to the drawer fronts, which meant there was little room for error when placing it on.


It took 2-3 days for the adhesive to completely cure and then my dresser was ready to go.  Up until now I had kept her hidden away in my closet, but now I think she deserves to be put somewhere she can be seen.

She turned out pretty great!  She reminds me of a dresser I saw at West Elm a couple weeks ago.

Patchwork Dresser
{source}
I was really impressed by how beautiful the veneer was and how easy it was to work with.  I think I may have found my new, favorite product.


I had previously bought hardware similar to the dresser's origional hardware.  The brushed nickel finish looks great against the natural wood grain.


In total, I spent about $10 for the adhesive, $75 for the veneer and $15 for the spray primer and paint.  That's a grand total of $100.  If I remember correctly, the dresser selling at West Elm was $999. 

Now that's a savings worthy of frostbite and permanent nerve damage!!!


Wednesday, February 6, 2013

Love is in the air...and cupid's arrow just hit me

In addition to most things wood, I have a slight weekness for lighting and mid century modern styling.

So, imagine my total and utterly uncontrollable delight when I happened across these gorgeous mid century-esque lamps at the thrift store recently.
I may, or may not, have done the running man when I saw them.
And when I saw that they were a mere $5 each I may, or may not, have broken out into the entire MC Hammer dance...ya I was that excited.

They kinda reminded me of something I saw at West Elm recently...
White Ceramic Vase + Wood Top
{These beauts range in price from $29-59}

I can't wait to spruce 'em up and find them a new home.  I think I have just the place for them.   


Wednesday, May 2, 2012

From $3 IKEA floor mat to flippin' fabulous floor pouf.

Wanna know how a couple of these striped rugs


become this cushy piece of bum lovin'?

Well, sit down and relax.  Let me start from the beginning.

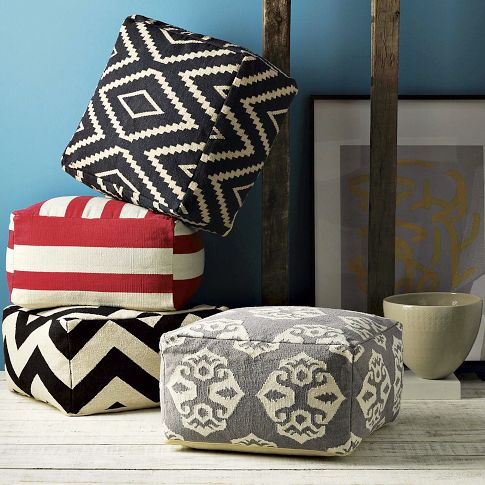
I happened upon these beauties a while back whilst browsing on West Elm's website. 
What a great {and fashionable} extra seating option, I thought. 
{I don't know how it is at your house, but when we get the whole fam together, it always seems like we are running out of seating.  Someone inevitably ends up sitting on the floor, or we end up redecorating by pulling chairs in from every room in the house.  That's all fine and good, family get togethers don't happen all that often, but I thought that next go around I'd make it easy on myself and get some floor poufs.  They are light, easy to move around and "totally in" right now.}  

If money were no option, I probably would have just bought them directly from West Elm.  But, since I do not have that luxury, I had to do the next best thing...knock 'em off. 

I don't know if I am just picky {or cheap...or both}, but I couldn't find any fabric that "spoke" to me.  I was hoping to have one of those "long lost lovers reunited moments", you know, where the fabric just appears-totally engulfed in angelic light and I'm so overcome with emotion that all I can do is crumble to the floor crying.  Anywho, it didn't happen.  So I just went home.  And that's when I saw these little babies hanging on my banister. 
No angelic light, no overflowing of emotion.  But hey, whatever. 

They are $3 rugs from IKEA.  I had bought three of them not really knowing what I'd do with them, but after looking at them, I realized that they would be an inexpensive and durable option.  So I totally ran with it...and hey whadaya know.  I love 'em...not fall on the floor and cry, love 'em, but almost.

All you need is:
mediocre sewing skills {by that I mean, the ablility to "fudge it" a little and sew in a straight
line}.
Three, $3 IKEA rugs
A Zipper {optional, but with five kids I needed my pouf cover to be removable/washable...this is where my fudging skills came in...didn't know how to sew in a zipper til I did it.  The zipper needs to be as close to the size of the opening as possible...my zipper was 22 inches.}
Filler {I found bean bag filler at K-Mart for $12.99 a bag.  You can use fiber fill, old car parts...whatever floats your boat, but I wanted my pouf to maintain its shape and be extra comfy for my keister.  I ended up using a little over one bag}.
And maybe some extra sewing needles since I broke three during the course of the project.

I started by cutting down one rug into two pieces.

One piece should measure 23in x 23in{or close to that, the widths of the rugs vary from 22 1/2 inches to 23 1/2 inches}, and the other piece should measure around 12in x 23in {again, it's super hard to be totally exact, because each rug is just slightly different in size}.
  
Cut down a second rug the exact same way.  You should now have 2- 23in x 23in pieces, and 2- 12in x 23in pieces.

Finally, cut your third rug down so that you have an additional 2- 12in x 23in pieces...for a grand total of 2- 23in x 23in pieces and 4- 12in x 23in pieces.


Now for the fun part...sewing.  I'll let the pictures do the talking, sound okay?


piece 6 is the second, 23in x 23in piece

once all six pieces are attached, you need to sew the corners.  The white arrows indicate where you should do this.

Here's what it should look like after the corners are sewed together.


Now you need to attach two sides of the bottom of the pouf.  The picture indicates where to do this.

Here's what it will look like after the two sides are sewn.  You should have only one side left unstitched now.
That opening is where your zipper will go...if you want one.  If you don't want a zipper closure, you would stitch this opening closed, leaving a small area open to allow for adding stuffing/filling.  You could then, either hand stitch or machine sew the opening closed after filling.

I realized after I'd made it to this point, that you want both edges hemmed so they have a nice, clean edge.  I lucked out, one of my edges was the selvage edge of the rug, but the other I had to hem under.


I turned the pouf ride side out, and slid one side of the zipper under one side of the opening.  I pinned it in place and sewed the length of the zipper.


Then I unzipped the zipper so that I could work with the other side.  I did the same as before, and slid the other side of the zipper under the other side of the opening, pinned and stitched the length of the zipper.


At this point, you could turn your pouf inside out and reinforce the zipper by stitching just above the top of the zipper, and just below the bottom of the zipper.  My zipper was just slightly shorter than the opening, so I had a little gap at one end that I needed to hem shut.  If you run into this same problem, it's no big deal.

Here's what the final product should look like.

And here's what it should look like after getting filled.


I ended up making two of these bad boys.  I spent $18 on 6 rugs, $39 on three bags of filler, and $5 on two zippers...for a grand total of $62 {or just over $30 for one pouf}.  The cheapest pouf I found on West Elm was $219.  That's a savings of $190.  Boo ya!  You could save a little more money by using a different filler, but I really wanted my poufs to maintain their shape and have a little firmness to them so I splurged and got the good stuff. 

 I can't wait to test 'em out tonight and catch up on a little T.V.