Tuesday, February 28, 2012

DIY Mantle...mini tute

I decided it was probably a good time to finally post a mini tute on my diy mantle.


I cannot begin to tell what a difference my awesome, chunk-a-licious mantle has made in my family room. Immediate coziness I tell ya. Everytime I see it, I am so proud to think that I made it with my own two hands...well with Studly's two hands, technically. We've gotten som many compliments from our friends and family. It's funny to see the look of utter shock and amazement on their faces when we tell them we did it ourselves. And I'll tell you right now, if a couple of nerds like us can do it...so can you.


Before attempting, we got a quote on having someone build one for us. The guy we talked to quoted about $300, and that was just for the supplies. I don't think that included the labor. Still, not too expensive, when you are talking about adding a permanent fixture to your home, but ever the penny pincher, I knew there had to be a way to build it for cheaper.


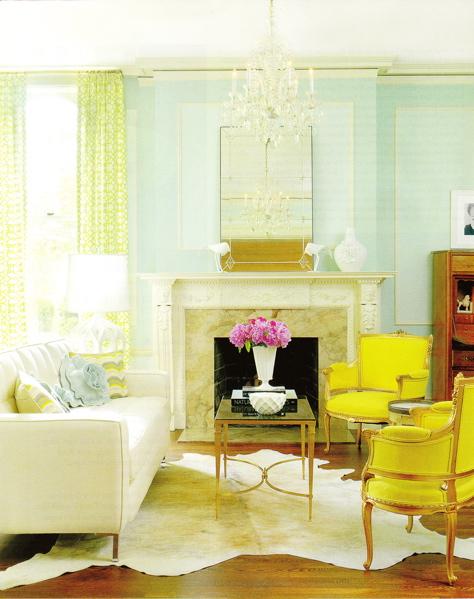
Then I came across this picture over at The Lettered Cottage and it was love at first sight.


No seriously, I have a picture of this mantle taped up next to one of David Beckham.


I have yet to profess my love to Palmer's, but I will someday, when I work up the guts. I love these two. They are seriously talented and inspiring. I always find tons of ideas and inspiration when I visit their blog. You should seriously check them out.


Imagine my elation when I learned that they had built their mantle for $82 {$82 Fireplace Makeover}. I was beyond excited. Not only was their's way more awesome, it was also way more budget friendly than any of the prefab ones I had researched. After reading through their post a couple of times I was convinced that I {well, Studly} could do it too. It took a little convincing...a little batting of the eyelashes at whatnot, but the old man finally conceded.


Which FINALLY brings me to the reason of this post...a mini tute.


It's hard to do a full tutorial on this subject, simply because there are so many variables {the amount of wall space, the size of the fireplace insert, etc.}, but I'll do my best to make it understandable.


Before we could start building our surround, we had to move our fireplace insert and tile around it. We chose a brown granite tile. This is where a chunk of our budget went. We spent about $60-70 on tile. It is not recommended to build a wood/mdf surround directly up against a fireplace for obvious reasons...fire hazard. So, if you don't already have a buffer around your fireplace, well then, you'll need to make one. Once done, you can move on to the the surround.


The wall where our fireplace insert resided was totally blank, so we had a lot of room to work with.


We decided on builiding a fairly good sized surround...about 7ft wide by about 5ft tall. {Most standard fireplace surrounds are about 60 inches tall.}


We started by constructing the "legs" of the surround. We did this by building a three sided box. We used premade 3 1/2 inch sqare, mdf molding which we cut to {approx. 55 inches}, then used another piece of mdf board which we cut down to {15 inches by 55 inches} for the front. You should now have box that extends out 3 1/2 inches from the wall, and stands 55 inches high.


Next, we moved on to the "skirt" of surround. We constructed this by cutting a piece of mdf down to 50 1/2 inches wide by 15 inches tall {the width of the legs is equal to the height of the skirt, make sense?} I might also point out, that fudging on your measurements is okay. Studly just sorta built and measured as he went along. Sometimes the way it is written on paper, doesn't always translate to the actual building. That's okay. That's what decorative molding and caulk is for. Here's what the surround should look like now.


Then, using more of the 3 1/2 inch mdf moulding, we cut it down and used it to "dress up" the surround. We started with the skirt and them moved to the legs. A "real" carpenter would miter all of these cuts, but Studly is a beaker salesman and I am domestic goddess, so we just used straight cuts...remember our good friend caulk.


Here's the part where our good friend SANDABLE caulk comes in. We filled in all of the joints we didn't want noticed, then sanded our keisters off.


For the actual mantle, I used pine boards, which I used to make a five sided box. The front piece of the mantle measured 83 1/2 inches wide by 7 1/4 inches high {which at the lumber store apparently means 8 inches}. The top and bottom of the mantle measured 83 1/2 inches by 6 inches, and the two sides measured 7 1/4 inches {or 8inches} by 6 inches. I nailed the pieces together using a nail gun. To give the mantle a rustic/reclaimed look, I took a hammer and aul to it. Dragging it around in rocks works well too. I distressed my boards before I assembled them, but you could do it after too. Then, I stained the mantle with a lucious, dark stain. After it was dry, Studs and I mounted it on top of the surround.


After we nailed on the mantle, I realized that the surround still didn't look finished. So, I went and got some 1 1/2 inch mdf moulding, which I put around the bottom of each leg and along the top of the surround to cover a small gap between the mantle and surround.


And finally...voila!


{sorry for the crappy, grainy pic. I couldn't find the cord to my camera, so I had to use a pic from my phone.}


I will admit, the painting, caulking and sanding was the most tedious part of this project. It was actually really fun to see our mantle come together right before our eyes. All in all, we ended spending about $150 to build our new mantle and surround. That also includes the tile. It required a little time and some elbow grease, but it was totally worth it dontcha think?


Friday, February 24, 2012

Just Call Me Bob {Villa}

I woke in a Bob Villa sorta mood today and had a hankerin' to build something. I thought about it for a little while, and after throwing around a couple of ideas, I finally settled on this:


You might remember this cute little thing from an earlier post. It's an "aged wood bench" from World Market and retails for $149. When I saw the price it felt like someone reached down my throat and puched my stomach from the inside.


I love this little bench. I really wanted this little bench. I have the perfect spot picked out for this little bench. But, there is no flippin' way I'm spending one hundred and fitty dollas on it...even if I love it almost as much as my kids.


After analyzing the picture for a while, and channeling my inner Bob, I came up with a way to recreate the look for only a couple of bucks...no seriously.


The best part...it only requires a few supplies:

* a table saw{if you don't have one, the guys at Home Depot do}


* a piece of wood {I used a leftover piece of 8x8x12 board, they retail for about $7}


* a wooden dowel{I used a cedar ballister. It cost about $2.50}


* Screws


* Wood Glue

The World Market version measures 34inches x 18inches, so I started out by cutting my board into three piecs: one at 34 inches, and two at 18 inches.


Then I dry fit my three cut pieces and measured the distance between the two legs.


Next, I found the center of each leg and measured up four inches from the bottom,


and drilled pilot holes


After that, I drilled pilot holes in the ends of my ballister and applied wood glue.


Then I screwed each of the legs to either end of the ballister.


I did the same for the top of bench. I centered the board on the legs, drilled pilot holes


applied some wood glue


then screwed it on.


When I referred back to the inspiration pic, I realized that the support dowel looked like it when through the board and protruded out the side. So, I decided to cut two, 1 1/2 inch pieces of ballister and glue them to the outsides of the legs, so that I could achieve the illusion of the wood extending all the way through the board. This wasn't a necessary step, it's purely aesthetic, but I think it adds a little somethin' somethin'. But you be the judge.


I decided to use my bench as an end table, since I didn't have one. But I think it would look super cute in the entry way, by the front door, or in a childs room. Really it would look fabulous anywhere.


I had to give my bench a good sanding. It had spray paint and spackle, and who knows what else on it since it had been sitting in the basement for a few years. You can still sorta see a little of the red spray paint, but it doesn't bother me too much. I didn't stain the wood, but I did give a nice coat of lemon wax just to help bring out the grain.


Now I realize that my little bench isn't nearly as beautiful as the World Market version, but bare in mind that it cost me under $10 to make, while the inspiration version retails for $149. So, while my bench may be a little rough around the edges...literally, I saved myself a whopping $139, so who really cares.


Thursday, February 23, 2012

My New Gig

I am super excited about a new little adventure I'm embarking on. It's not a huge biggie, but I am super stoked {been hanging around my 13 year old too much}.


A few weeks back I became acquainted with this hot little mama, named Brittany.


She lives over at love stitched. We got to talking {well emailing, technically} and she asked me if I'd like to be a contributer over at her place. I've always wanted to be able to say that I have a second home, so I went ahead and said yes.


I'll admit, I'm a little nervous. I mean, my little ole bloggy here is sort of my online diy journal. I do it more to document my insanity...err, my ideas, for myself and my posterity. I don't really consider myself seasoned enough to "contribute" anything, but it appears that I've fooled somebody.


So, once a month I will be posting fun, little tutorials over at my new, second home...love stitched...along with some other equally "hot and spicy" little mamas. You should definately come over and visit us. We'll totally party it up at the new pad.


Monday, February 6, 2012

Going Granola

When I started my blog a year and a half ago I was completely obsessed with painting stuff...anything I could get my hands on: funiture, front doors, even kids if they got in the way. It seems as though, back then, it was all about finding whatever you could and painting it some fantastically bright color. Don't get me wrong, I still love spray paint...the brighter the better in my book {go big or go home right?}. I just used some a few days ago, in fact, but I find myself evolving into a new phase of life. I'm not sure what you would call it...my granola/au naturale phase perhaps. I haven't totally given up on spray paint. As I said, I just painted something the other day, but I guess I'm realizing that there is some truth to the adage "all things in moderation". Which brings me back to the point of this post...


I've always loved the aesthetic of natural wood and fibers and the mentality of bringing the outdoors in. And I'm beginning to love it more as I see more and more earthy influences emerge in interior decorating.


I'm not sure if it's just a passing fad, or if I have finally found my style niche. It may be a little bit of both I suppose. I still like my occasional spray painted piece of furniture...nothing can really stand up to a turquoise {insert furniture item of choice} if you ask me. But pairing said item with natual elements is a total win win situation...the perfect balance.


Here are some inspiration pics of my current favorite, au naturale pieces.


I love this vignette...a reclaimed wood mirror and rustic, slatted table. I have to admit, part of me is aching to grab that candle holder and give a good dowsing of spray paint...preferably of the turquoise kind. But, note how the beauty and character of both the table and mirror would be lost if it were covered up with paint.


I love this little reclaimed wood bench. It would be the perfect accent to a dining table, or living room. I think this little guy would work perfectly as an end table at my house.


I love the earthiness of this table and bench. I love all of the variation in the wood.


I really love these mango wood vases. Love at first sight. Available at West Elm in case you were wondering.


Okay, I am absolutely in love with this tree stump side table. I love, love, love it. I know for a fact they are on sale right now at West Elm and I have been scouring the kiddies piggie banks, the couch cushions and all the pants pockets for stray dollar bills so I can start my stump fund.


Thursday, February 2, 2012

Living Room: Update...and my latest fave.

I'm not totally ready for a full reveal of my living room just yet. I only have one shelf painted, which I finally finished yesterday. Those things are beasts...so many nooks and crannies. BLECH! I'm hoping to start on the second one today, or at least some time this weekend...once the muscle's in my forearm and shoulder quit spasming. Anyway, here's where I'm at as of today.


In the meantime, I started working on another little project...you know, just to break the monotony of bookshelf painting. You should have caught a little glimpse of it in the pictures. I'll give you a hint: it's brown and white and walked all over. That's right, my faux cowhide rug.


I've been wanting to try this project for awhile, but just haven't gotten around to it.


I understand that they are a bit of an acquired taste...these cowhide rugs. I didn't always love them either, but recently I have had a change of heart. I'm slightly obssesed with them now. I find myself daydreaming about going to the textile department of IKEA just so I can sit and stroke their velvety softness. I'd love to bring one home with me, but I'm having a hard time stomaching the $200 price tag for something that my kiddies would probably destroy within 24 hours. So, I did what any thrifty gal would...I came up with both a BUDGET and KID friendly version. You animal lovers will like this option too.


I'm not going to post a full tutorial just yet, but don't worry. It's coming. Here are some pics of two different versions I made. One from canvas, and one from some vinyl-ey/pleathery stuff.


canvas dropcloth version


faux leather/pleather/vinyl version


I wasn't sure if the paint would adhere to the vinyl, but it's actually held up quite well so far. We walk on it daily, and the kids have even played Just Dance on it. None of the paint has rubbed off yet. {The paint, however, did stay tacky for several days afterwards, but whatevs.}


If haven't succeeded in convincing you of the awesomeness that is {animal hide rugs}, take a look at some of these inspiration pics and "chew" on em for a while {Get it? "Chew" on em, like a cow "chewing" on it's cud. Nevermind!}


I love how these otherwise ordinary-ish rooms become extraordinarily fabulous just by adding a bit of animal print. These rugs are miracle workers I tell ya. Are you convinced now? I knew you would be. All righty then, get out there and get yourself one of these beauties. Happy hunting! {and by hunting I mean, go to the store and buy one or make one of your own...don't literally go out and "hunt" your own rug, please!!!}.