
I came across these gorgeous pendant lights at West Elm a while ago.
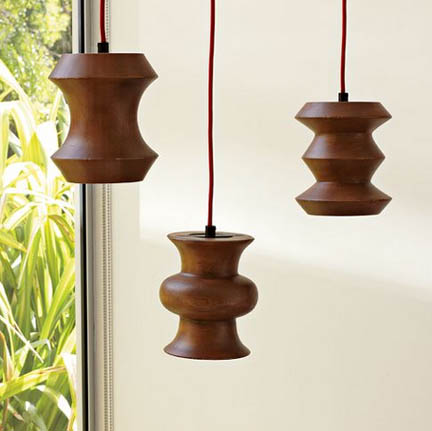
I love that they are made out of wood. I am obssesed with wood in all it's varieties right now. There is just a warmth and beauty about it that I cannot get enough of.
Anywho, when I saw these lights I knew I needed to have them. But when I saw that they were $99.99 a piece {they have since gone on sale and are now $34.99...still out of my budget} I knew I'd have to admire them online instead of in my {hopefully going to be renovated soon} master bath.
I thought about ways I could recreate the pendants using a wooden bowl, vase or container of some sort. But those things can run upwards of $20-$30 a piece which would defeat the point of making one myself and saving money.
Then I came across this darling light from the blog poppytalk

It's carboard? Genius!!!
That got the old wheels a turnin' and I came up with this little piece of delicious-ness...almost literally. It's made out of old pizza boxes.

Rather than keeping the bare cardboard, I opted to cover one side of it with wood grain contact paper to give it the wood look I was so wanting {I spray painted the opposite side with white spray paint}.
Here's a list of what I needed to make it along with a mini tutorial should you wanna getting your basket weave on.
Supplies: Glue gun, glue sticks, 40 cardboard strips cut to 12in X 1.5in, 40 strips of contact paper cut to 12in X 1.5in, white spray paint {optional, but for painting one side of the cardboard strips}, light cord kit {I got mine at Ikea for $3-4}
I used 10 cardboard strips per side of the square light. I layed out 6 strips, one above the other, and wove in the four other pieces, spacing them equally. I secured the strips with hot glue as I went along.

Here's a picture of what each side should end up looking like.
Once I had my four sides done, I hot glued them together to make a square.
The joints were a little messy and unattractive, so I cut a thin piece of contact paper and covered the joint with it to give it a more finished look.

Next, I used a remaining piece of cardboard to create an area for the light bulb socket.
I centered the light bulb socket on the cardboard and then traced around it.

Be sure to remove the ring before tracing or your hole will be too big.

Then I cut out the hole

covered it with contact paper {and painted the other side} and cut out the hole again...duh!

I dry fit the piece into the top of the box

and leveled it as best I could before I hot glued it in place.

Then after the glue was dry, I inserted the light bulb socket...


And tried it out...please let there be light!


The socket/cord I used is a plug in cord, which I will convert into a hard wired light when the master bathroom is finished {tutorial on how to convert a plug-in to a hard wired light will come later}.

I had a hard time getting a decent "staged" picture of the light because of the cord and it needing to be plugged in, but here's a little something just to give you an idea...use your imagination.

Now that's what I call recycling. Did I mention that this project didn't cost me anything. I had all of the supplies on hand. But even if you did have to run out and buy the supplies, it probably wouldn't end up costing you more than $5 to make it. Take that $35, West Elm, porky hefer pendant light.

oooh, how clever! love a good DIY especially when it includes pizza....
ReplyDeleteErika, you are soooo cute and soooo clever! I love what you do :-)
ReplyDelete