We aren't quite there yet here in SLC, but we are getting close. I can feel the briskness in the air at night and I'ma gettin' giddy...cause that means Halloween is right around the corner.
Halloween just happens to be the favored holiday around these parts. So in honor of the impending holiday, I made a fun, festive countdown calendar...uh-hum, for the kiddies of course.
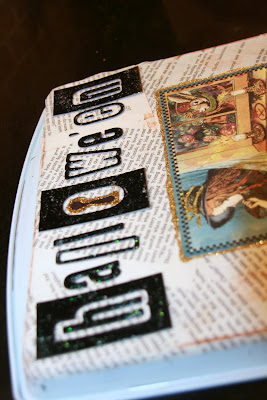
Some of you may have happened upon my cookie sheet advent calendar post last Christmas. I did the same thing with this Halloween countdown calendar. I purchased an old cookie sheet from the thrift store for a buck and off I went.
 Surprisingly, not all cookie sheets are magnetic, so should you decided to try this at home, be sure to take a magnet with you to test out the "magnet-icity?" of the cookie sheet.
I started decorating it by Mod Podging old book pages to the bottom of it. {The side used to bake on will be used for storing your magnets as you remove them. You can decorate this side too, but since you won't ever see it, it isn't really necessary}. A little off the subject, but I came across a recipe for making your own Mod Podge whilst browsing the net one day. It is merely equal parts white glue and water. Simple. Cheap. And it really works. I used it on this project. After that was dry, I embellished with some fun Alice In Wonderland themed scrapbook paper.


I added a little glitter detailing because...who doesn't love a little glitter?
I also had a stack of chip board letters on hand, so I used those too.

And as a final touch, I printed off some lettering from the computer, cut them out and podged them on as well. { because I don't have a silhouette...yet. Uh-hum, Studly.}

Here she is all embellished, just waiting for her magnets.

Then, I literally started gathering odds and ends out of my junk drawer and whatever else I had lying around, to use as magnets...drawer pulls, coins, thread spools, bottle caps, clothes pins, dominoes, dice...

By the way, did you know that bottle caps, at least the one's from Crush brand soda pop, already come numbered.

I used my paint pen and numbered rub on transfers to label my magnets 1-31. Then I hot glued magnets to them...and voila, done.

It's kinda hard to see, but number six is actually a little glass bottle with a cork in it. It's my favorite magnet of all. It's just so teensy and cute.
And the best part of all is that the backside provides the perfect spot for storing the unused magnets.

I think I might drill holes into the top of my cookie sheet so that I can thread some ribbon or burlap through it to hang it on the wall. But, you could always nix that and simply prop it up on a photo stand.
Since all I had to go buy was the cookie sheet, this project only cost me $1 and couple hours of my time to make. Not too shabby, eh? I can hardly wait for the countdown to begin.


Just want you to know that I've used your countdown to Halloween idea. Love it! I went to The Graphics Fairy for the background I mod podged on my cookie sheet. I also found 31 "vintagey" images which I backed with sheets of peel-and-stick photo magnets, cut to size, and numbered for my count-down. Such a fun idea! Thanks, Barb
ReplyDelete