Showing posts with label revamp. Show all posts

Wednesday, June 12, 2013

Carpet in the kids room...finally.

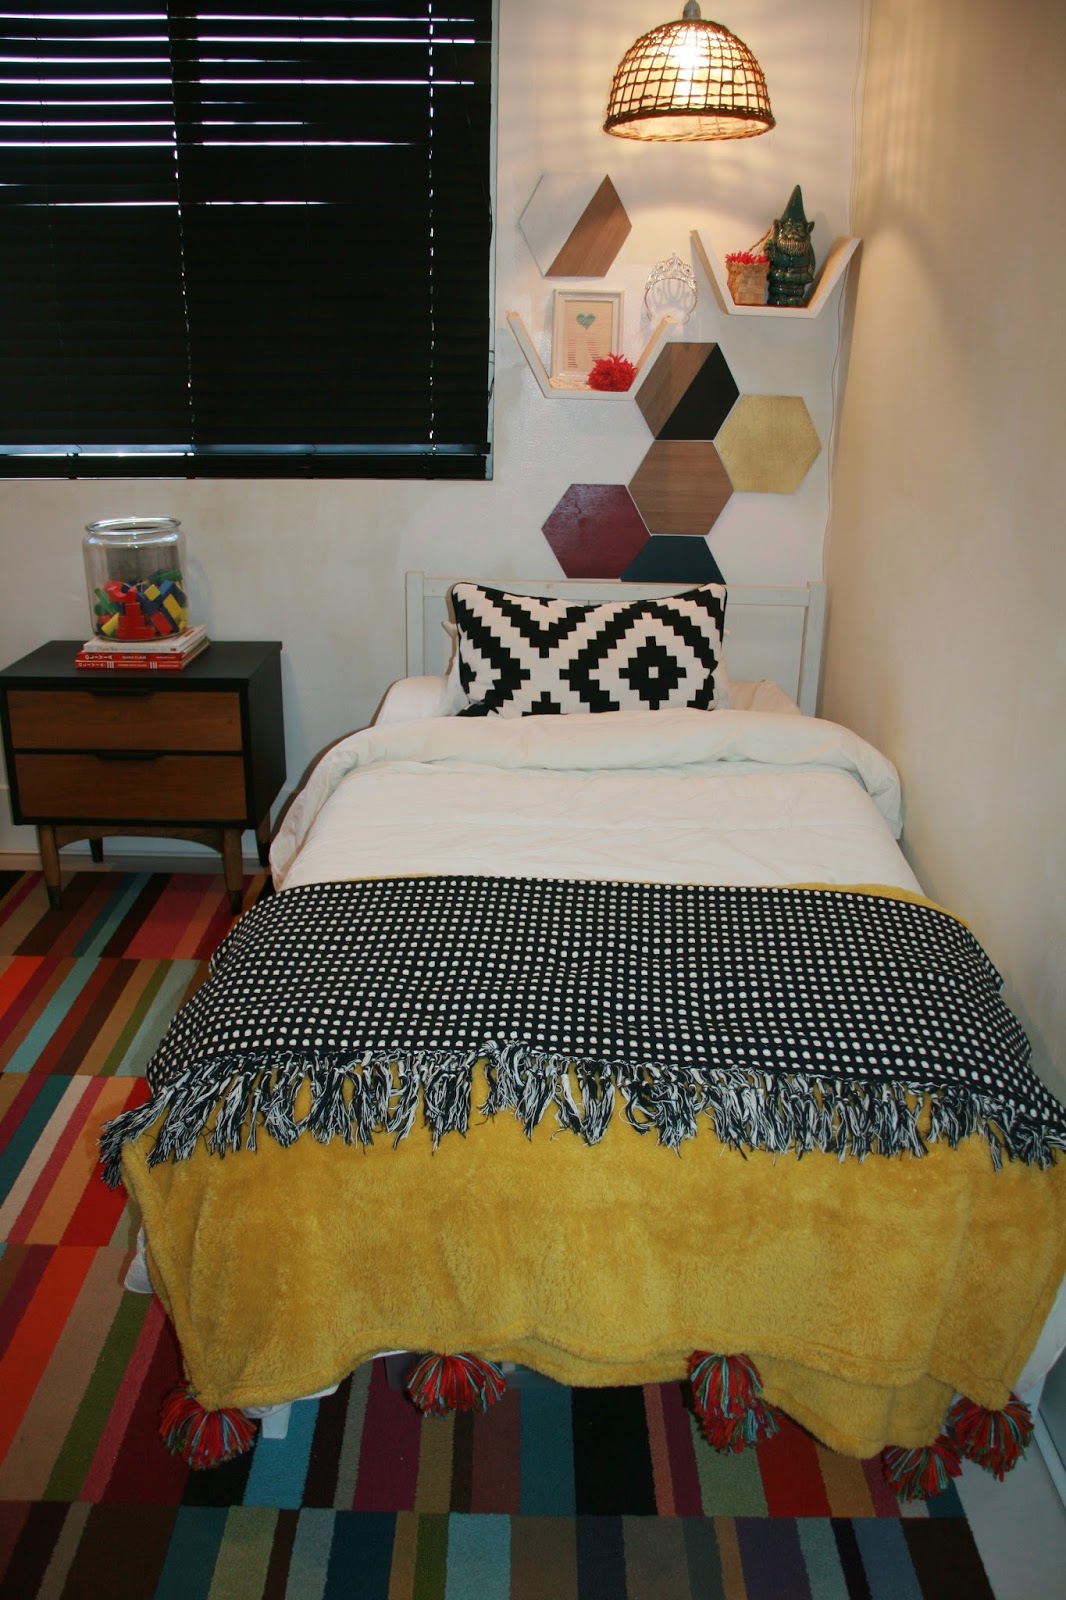
The kids' room has new carpet...finally!
What a glorious feeling it is to walk in the room and smell new carpet instead cat pee. 
If a girl could be in love with carpet, then this carpet would be it for me.  It is so fun and colorful and sophisticated and....well, here just take a look for yourself.


I was giddy when I came across these carpet tiles on flor.com.  I had been wanting to try some of their product for a long time and I finally just bit the bullet and did it.  They are a bit of an investment, but the trade off is that the carpet is totally modular.  If you end up moving or decide you want the carpet in a different area you just gather them up and you're on your way.  I just love that!!!
Oh, and did I mention that right now everything at flor.com is 25% off? And no,  I am not sponsered by these guys, but I totally should be.  I just wanted to share the wealth, or savings rather, should you be interested in getting your floor/flor on.

The tiles themselves are super easy to lay, but I didn't realize until after I had purchased them that they cannot be put down directly onto radiant heat...which we have.  So, before I could lay the carpet, I had to put down some new flooring as a buffer.  I ended up using some laminate from Ikea, which I also love...though more just as a friend.

The motif of the room didn't really seem to jive with the new carpet, so I did a little tweaking and revamped the rest of the space while I was at it, but that's a post for another day...like tomorrow.

I'm off to the mall with the kiddies to make a stuffed bear or something.  But if you're in the mood for some more kids room inspo, check out some fabulous ideas here on a great new DIY/all things home site I just came across (topreveal.com).  I'm already making plans for my next kids room redo.


Tuesday, March 26, 2013

My two chairs.

I finally finished reupholstering my thrift store find from last week.  Here's what they looked like before.

I thought they were pretty cute to begin with.  I love the caning and wood, but they were definately in need of some updating.

Here's how they look now.
I put about $100 into revamping them...$60 for fabric {I used three curtain panels from Ikea}, $15 for decorative/fabric trim, $10 for "nail head trim" {I used extra large thumb tacks I found at Hobby Lobby}, $5 for fabric glue and $10 for a button cover kit.

I was a little worried how they would turn out, having never actually completed any repuholstering projects I've started in the past, but I am happy with them...even happier with the price {$65 for each chair}.

I ended up just using the old cushion covers as my patterns for the new ones.
I simply traced around them, leaving an extra 1/2-1 inch allowance.

I used decorative fabric trim to hide the staples I used to attach the fabric to the back and front of the chair.

I embellished the trim with extra large thumb tacks...for a nail head trim look.


I added some tufting detail to the front cushion.  
I used a kit to make my own fabric buttons, which was relatively inexpensive and simple.

I didn't want to bother sanding and refinishing all of the wood, so I just took some dark stain to the scuffed up spots and caning to freshen everything up a bit.  
{Here's my little staining tip.  Put a plastic bag on your hand with an old sock over it.  Use the sock to rub in the stain, then when you are done just pull the plastic bag off, while holding on to the toe of the sock, and your sock will end up inside the plastic bag ready to toss into the garbage.}


Here's how the chairs look in their new home. 


 They are just what my front room needed to finish off the seating.

In other news, we finshed ripping out the remaining items in the master bathroom...the vanity, sinks,  toilet and shower floor.  


We are officially down to one bathroom.  Fingers crossed we all survive this.  Seven people and one bathroom...scary!!!


Monday, April 23, 2012

To contact paper or not to contact paper? That is the question.

I have really become obsessed with natural wood lately. I just love the warmth and earthiness it can bring into a room. I love that it can add texture and visual interest, while at the same time remaining netural. Wood is like denim...everything just seems to goes with it.

The other day I came across these lovlies and was smitten. The shades remind me a little of the sixties, but I don't mind that mid-century modern look so much. Besides, when they are paired with the right lamp base, like in this picture, they become totally current.


The only downside to these gorgeous lamps, is that they can be pretty spendy. I saw some selling for as much as $170...just for the shade. So, I started brainstorming ways that I could recreate the look for cheaper.

I researched wood veneer and found that it was less inexpensive than the shades themselves {ranging in price from $40-$70, depending on what kind of wood and the color etc}, but that was still a little too spendy for me.

Then I remembered ripping out a bunch of contact paper shelf liners when we moved into our current house. Of course, at the time I thought the idea of large, fake wood, stickers was repulsive and in very poor taste, but I started to wonder if I could actually make it look respectable.

I decided to give it a try. I bought a 24ft. roll of the stuff for $3.50 and figured I wasn't out much if it ended up looking tacky and crappy.

I decided to try it out on this very unassuming lamp. She's not hideous, but she could be so much more...maybe...hopefully.


After about fifteen minutes of wrestling with the contact paper and finding the best way to go about wrapping it around the lamp shade {this particular lamp shade couldn't be removed from it's base, so it was a little awkward} I ended up with this.


What do you think? Be honest. I was really skeptical at first, but when I put her back on her crate, I thought she actually looked pretty hot...in a totally inantimate sorta way.


The biggest difference between my c.p. version and the veneer version is, well, the fact that mine is plastic contact paper. But unless your guests have a tendency to rub their hands all over your lamp shades, you should be able to get away with it. The other slightly noticeable difference is the sheen. C.P., has a little more shine to it than the veneered version which is more matte.
That said, I only spent $3.50 as opposed to $170 and with that kind of savings I am totally okay with a little shine.

So, what's the verdict? Yay yay, or nay nay to contact paper?